Search This Blog

Monday 7 May 2012

From Tomcat to GlassFish (part I) - Getting Started


I've been using Apache Tomcat for some time now and it has done me well. I work for a small company that develop and deploy Java Web Applications and I was tasked with finding and deploying an enterprise grade server for our applications and so I've gone with Oracles GlassFish sever.

Tomcat is a Servlet/JSP container that you can configure and do allot with but GlassFish does so much more out of the box. GlassFish has allot more Administration tools and is supported by Oracle, it also has it's own HTTP front end called Grizzly.

To get Started download the latest version of GlassFish from here. You have the option of the Open Source edition or the Oracle server. For this purpose we are using the Open Source Edition.
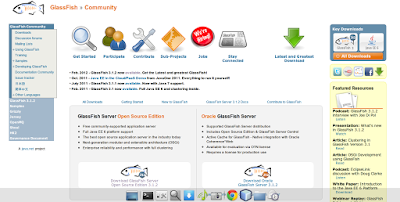


Once Downloaded you should have a glassfish-.zip file. Extract this anywhere on your system that you like (/opt/glassfish is a sugestion) and open up a terminal and cd to that directory. In this expanded Directory you will see the following

  • Bin - binary files including asadmin
  • glassfish - includes further directories for the container(s)
  • javadb - Java Database (optional use not discussed here)u
  • mq - Message Queue (not discussed here)
  • pkg - package directory used for updating and extending GlassFish

Before we start make sure you have a JRE or JDK installed on your system. You can download the latest version from Oracle http://www.oracle.com/technetwork/java/javase/downloads/index.html
If like me you have multiple java versions on your system such as Oracle's JDK and OpenJDK you might want to specify exactly what one you want GlassFish to use. You can do this by adding this line to the file /glassfish/config/asenv.conf
AS_JAVA="/usr/PATH TO your JDK or JRE"
You can use any text editor to do this such as vi.

In the bin directory you will find asadmin, you use this to administrate GlassFish via the command line. Add asadmin to your path or cd to the bin directory and type ./asadmin help for more information on what you can do.


By default GlassFish comes with a domain already set up (domain1), you can see this in /glassfish/domains , you can also view domains by entering asadmin list-domians.
Lets remove this default domain and create a new one............
# asadmin delete-domain domain1
# asadmin create-domain example
You will then be asked to give an administrator name and password or you can press enter to accept default user admin with no password (for obvious reasons doing this will leave your GlassFish insucure).


As you will see GlassFish goes ahead and uses some default port numbers. Default port numbers are....


4848 Admin port
8080 HTTP Instance port
7676 JMS port
3700 IIOP port
8181 HTTP_SSL port
3820 IIOP_SSL port
3920 IIOP_MUTUALAUTH port
8686 JMX_ADMIN port


You can change these in the Admin Console (Will be covered later) or by editing the file /glassfish/domains//config/domain.xml , this file is the equivilant to Tomcats server.xml file. You can also change ports by issuing commands like so........

  1. To change the HTTP port to 10080:

    asadmin set server.http-service.http-listener.http-listener-1.port=10080
  2. To change the HTTPS port to 10443:

    asadmin set server.http-service.http-listener.http-listener-2.port=10443
  3. To change the administration server port to 14848:

    asadmin set server.http-service.http-listener.admin-listener.port=14848 
If you have a port range in mind you can change the port numbers on creating a new domain. This is also very handy if you are creating multiple domains. When creating a new domain you can pass the argument portbase with the portbase number of your choice and it will increment the portnumbers to that number like so.......
Admin port: portbase + 48
HTTP listener port: portbase + 80
IIOP listener port: portbase + 37
JMX port: portbase + 86


Lets say you have decided on a portbase of 2000 you would type......
# asadmin create-domain mydomain --portbase 2000
and GlassFish will give you a new domain "mydomian" with HTTP port 2048, SSL port of 2081 etc. this can save you time and instantly resolves port conflicts if you are creating multiple domains.


Now that you have done all the set up it's time to run it up and try it out. You can monitor the log as you start it up by tailing the /glassfish/domain//logs/server.log file. Issue the command asadmin start-domain so in this case asadmin start-domain example.


Now you can open up your web browser and enter localhost:8080 you should be presented with the following page. 


Congratulations you have successfully set up your GlassFish server. Next time we'll look at further configurations, using the admin console, security and web applications. Stay Tuned.


Wednesday 12 May 2010

NoS-LUG t-shirts

Some of the members of NoS-LUG are planning to go down to Oggcamp next year (I hope it will be on) and to mark the occasion we decided to make some t-shirts for the group. The first design is shown below:


In case the image isn't clear we have a tartan Tux sitting on a world map with arrows pointing to all corners of the globe. 'NoS-LUG' at the top and'on tour' at the bottom. With the back print simply stating the website adress 'NoS-LUG.org'

I decided against going for an Oggcamp logo simply so that the t-shirts could be used again for other vsits without looking dated, general visiting regalia you might say.

Please post any comments of this on the NoS-LUG forum, although it may seem a bit away we need to get moving now to get these made and then orders taken. I want to make sure the quality of the manufacturers gear is up to scratch so I will be expecting to get some samples. I just hope we will have enough time.

Sunday 2 May 2010

Tomacat on Linux Part 3 - Performance

Performance.
Tomcat offers many configuration options that can improve the performance on your system. Here I'll be covering some of the main configuration options for boosting performance you may want to look at.
TCP/IP configuration
Ipv6 as of yet is not widely supported on all networks, this can cause a problem and even connections can be dropped. By default this Tomcat installation uses Ipv6 but this can be changed easily. If you open up a terminal and type $ lsof -i you will be presented with a table that shows what is using Ipv6 and what is using Ipv4. [Christopher Schultz. (2010).]
To configure Tomcat so that it uses Ipv4 instead of Ipv6 shut down Tomcat using either the shutdown.sh script or the “$ service tomcat stop” command then type
$ export CATALINA_OPTS=-Djava.net.preferIPv4Stack=true
Then start Tomcat once again and check that it is now using Ipv4 with the $ lsof -i command.
Heap Size
Runaway programs could cause a problem, eating up all your RAM and overwhelming your Operating System. The Java runtime environment has what is called a “maximum heap size”, this is a limit on how much memory can be used and prevents any potential problems caused by any runaway program. For JDK 1.3 for example the default limit was 32MB, this was established at a time when memory was more expensive. [Jason Brittian (2007). p19]
You can improve the memory usage by setting the environment variables your self or for each class for example $ java -Xmx=256M MyClass will run a class file called MyClass with a maximum memory size of 256MB. To change the environment variable in JAVA_OPTS you can type in
$ export JAVA_OPTS=-Xmx256M
This will now set the environment to run classes at a maximum of 256MB thus improving the performance over the default option. Using the JAVA_OPTS function will make system wide changes, you can limit the changes to be Tomcat only by instead using
$ export CATALINA_OPTS=-Xmx256M
Now I'm going to use a load testing tool to measure and see the difference in performance that changing the heap size can have. The tool I'm using is Jmeter, you can get this for Ubuntu by typing
$ sudo apt-get install jmeter
First with CATALINA_OPTS being set to 32M Jmeter came up with these results
From these results you can see that 5000 HTTP requests were thrown at Tomcat and the average time to process those requests were 327 milliseconds with the Maximum time being 5161 milliseconds and the throughput being 116.6 requests per second. Now we can compare these results with what we get after changing the environment variable to 512M
The average time has dropped from 327 to 17 milliseconds and the maximum time to 1164 milliseconds. The throughput has increased from 116.6 requests per second to 167.7. So here you can see the performance boost you can gain from increasing the heap size.

Timeouts and connections

Idle connections can cause a lot of consumption of the system's memory resources, this can be prevented with the use of a connection timeout. By configuring the connection timeout variable you can control how long server resources are allocated to tasks and clients. [Microsoft. (2003).] To change the connection timeout variable go back to edit your server.xml file as was done for changing the port number, you'll find the conectionTimeout variable just below where the port number is defined. Change this number to suit your needs, this time is in milliseconds but keep the timeout within a sensible range as making it too low can be counter productive.
If we change this variable so that connectionTimeout="20000" and run Jmeter we get these results :
And if we now change this variable to connectionTimeout=”50000” and run Jmeter we get these results :
As you can see from these results the higher the connection timeout time the longer each sample takes to process. Now just to show the effects of having the timeout set too low, here are the Jmeter results with a connection timeout value of 1 :
From these results you can see that not only is the process time greater than the other two timeout values but there is a significant error percentage level shown where many samples where just simply unable to connect. [Jason Brittain (2007). p156]
You can also define the maximum number of connections you want to allow to your server, by doing this you can prevent Denial of Service attacks and too many connections eating up your system's memory. You can set this variable in the server.xml file by simply uncommenting the following line :
Here the default maximum connections allowed is 150, you can change this value to suit your needs and the demands on the server.

DNS Server

Web Applications can log a client's details such as looking up their Domain Name Service data. These DNS look ups can cause delays as it causes traffic from your server that could pass through many servers that maybe far away. To stop this from happening edit the line enableLookups so that the value is changed from true to false in the server.xml file. By changing this variable the server will no longer go off to find the DNS data, instead it can just log the numeric IP address, then if required the DNS data can be looked up outside of tomcat. This setting can also reduce disk space usage as less data is stored. [Jason Brittain (2007). p156]

Performance Monitoring

Changing these values can improve performance but over time with the possibility that visitor numbers may increase you might need to tweak these settings to keep good performance. You could periodically run Jmeter to check your server's performance optimisation or even write a script to automatically run a load testing tool such as siege and log these details for you.
Now that we've looked at installing, configuring and optimising performance of the Tomcat server you'll want to be able to secure it, the next part is on making your server secure.

Wednesday 28 April 2010

Gentoo Gnome Screenshots

After attempting my first Gentoo build with a KDE graphical environment, I switched back to Gnome after 5 bug filled months, the system is running quicker and I have had a lot less crashes and programmes freezing. The one major thing about Gentoo is the clarity and smoothness of the graphics. Here are some screenshots of my work (I know that there not to everybody's taste, but I am a Bluenose):

This is my first Gentoo build. For anybody thinking about attempting Gentoo then I will give the following pieces of advice that I have found very valuable:
  • Read everything, assume no prior knowledge
  • Ask questions on forums etc, go back to being a newbie
  • You'll get a working distro quickly, it will take a lot longer to perfect
  • Learn about flags, portage and ebuilds
  • Be prepared to spend a lot of time on the computer, make sure your schedule is empty
Other than that all I'll say is good luck, it really is worth the work in the end.

Sunday 21 March 2010

Tomcat on Linux Part 2 - Configuration

Configuration
Automatic Startup
As this installation is based on the generic multi-platform you'll have to create a script that'll allow you to start tomcat on boot. Using your preferred text editor type out a script similar to this
#!/bin/bash
#Tomcat startup script
JAVA_HOME=/usr/jdk1.6.0_17
CATALINA_HOME=/home/stephen/apache-tomcat-6.0.26
export JAVA_HOME CATALINA_HOME
exec $CATALINA_HOME/bin/startup.sh
Save the file as tomcat and change the file ownership to root and chmod it to 755 to make it executable.
$ sudo chown root.root tomcat
$ sudo chmod 755 tomcat
This next step will depend on the distribution you are using, you can copy the file into the directory containing your init scripts so that it starts on boot e.g. /etc/rc.d/init.d or use your distributions start up application manager. In Ubuntu go to the start up applications found in System>Prefrences>Startup Applications and add the tomcat file you just created in there.
Now restart your computer and test Tomcat in a web-browser as before to make sure it worked. At this point in your browser Tomcat is most likely still using the default port of 8080 where in the address bar it says http://lochalhost:8080. Copy / move this file to /etc/init.d/ to run as a service.
Changing the Port address
One thing you may want to change is the port number that Tomcat runs on. This maybe due to you having another instance of Tomcat running or another server already using that port. Another reason that you may choose to change this is if it interferes with something else such as one person I know who had a printer and discovered that after installing and running Tomcat the printer wouldn't work, it was later discovered that the printer uses the HTTP protocol on port 80. The port that the server uses can be changed in the server.xml file found in apache-tomcat-6.0.20/conf . Use your prefered text editor to change the port number like so.
$ sudo gedit ~/apache-tomcat-6.0.26/conf/server.xml
Once you have changed the port number to something of your choosing that you feel is more appropriate (there is plenty of material on the Internet covering port numbers but for a brief description and list of port numbers visit http://www.iana.org/assignments/port-numbers) save the file. Now start up the server and test it works like before but now with the new port number e.g. http://lochalhost:9915 .
Change the default Web Application and temp Directory
We looked at how to change the port address to prevent potential conflicts, now we're going to change the default Web Application Directory. Why would you want to do that? Well by default the directory resides with in the Tomcat root directory with all the other directories and files that make it work. If you decide to update Tomcat you run the risk of loosing your own files if they are kept inside Tomcat. Another reason you may want to change the default directory is if you want to run more than one instance of Tomcat and need both to access and share your own files. To be able to do this you can set the CATALINA_BASE environment variable to point to your desired directory while CATALINA_HOME points to the root Tomcat directory. To do this, in a terminal type
$ mkdir ~/dist (create a new directory with the name of your choice)
$ cd dist (cd into that directory)
$ cp -R ~/apache-tomcat-6.0.20/conf (copy the conf directory from tomcat)
$ mkdir common logs temp server shared webapps work (create these new directories)
The reason for copying the conf directory and creating these new directories as well as the webapps is that this folder will be used to hold our personal stuff, logs and configurations so that any future Tomcat upgrade won't write over them and upgrading won't be a painful process. Now that you've created your new directory you'll have to set up the CATALINA_BASE variable.
$ CATALINA_HOME=~/apache-tomcat-6.0.20
$ CATALINA_BASE=~/dist
$ export CATALINA_HOME CATALINA_BASE
This will point the relevant environment variables to you're personal files including webapps and the root tomcat directory for it to run. You may want to add this line to your start up script otherwise these settings will be lost the next time you boot. You're start up script should now look something a bit like this
#!/bin/bash
#Tomcat startup script
JAVA_HOME=/usr/jdk1.6.0_18
CATALINA_HOME=/home/stephen/apache-tomcat-6.0.20
CATALINA_BASE=/home/stephen/dist
export JAVA_HOME CATALINA_HOME CATALINA_BASE
exec $CATALINA_HOME/bin/startup.sh
When you start up tomcat with these settings you might notice that CATALINA_TMPDIR automatically points to ~/dist/temp, you can change the location of the temp directory if you so choose using the same method as above.
These configuration options can be defined for the environment in which you're using the service and on personal preference. Next we'll look at configuring Tomcat to improve performance.

Monday 22 February 2010

Tomcat on Linux part 1 - Installation

Introduction.

The purpose of this document is to outline the issues involved when installing a web server such as Apache Tomcat. This paper is very Tomcat specific but some issues will be similar to setting up other server software. This document is a guide to installing, configuring and securing Apache Tomcat Server on a Linux system.

Why Tomcat?

Tomcat is written in Java so it can run on pretty much any platform. It is Open Source so is freely available and re-distributable, it implements Java Servlets and and JavaServer Pages (JSP) and provides a pure Java HTTP web server environment for Java code to run. [Wikipedia, 2010] As the Apache Software Foundation puts it “Apache Tomcat is intended to be a collaboration of the best-of-breed developers from around the world.” and it is also used in many mission critical web applications used by many large scale organisations and companies around the world. [Apache Software Foundation, 2010] .

Installation.

I have chosen to install Apache Tomcat server on Ubuntu 9.10 although the following instructions can be applied to most Linux Distributions. There is an RPM available for Red Hat based distributions but as I'll be installing it on a Debian based system I'll be using the multi-platform binary release which comes in the form of a gzipped tar archive. Unfortunately a deb file is not available due to the Apache Licence being incompatible with the GPL. By installing Tomcat using this method you have the choice of what directory you'd like it installed to, the downside to this though is that it is not tracked by any package manager and can be more difficult to upgrade later. But before you start with installing Tomcat you need to ensure you have the latest Java runtime (JRE) installed.

Installing Java.

At the time of writing you can get the latest JDK and JRE from Sun / Oracle at this address http://java.sun.com/javase/downloads/index.jsp . From this page click on download next to the newest JDK available (the JRE will be included with this). You don't need to get the JDK if you don't want to as all you really need is the JRE, but the JDK is good to have if you're going to create your own Java applications. At the download page there is the option of what platform you'd like to download for e.g. Windows, the current OS you are using is normally selected by default (in my case Linux) but there is also the option for Linux x64 platforms. I stick with the default Linux option and click download. After being presented with a pop up to log in or register (this step can be skipped which I did) you are given download options RPM or bin. I choose the bin file and the download starts.
Now the file can be found at your downloaded location such as your “Downloads” directory. Open up a terminal and cd to that directory, you'll need to make the file executable then run it. I used the following commands.

$ cd Downloads
$ sudo chmod +x jdk-6u18-linux-i586.bin
$ ./jdk-6u18-linux-i586.bin

You'll be presented with the installer, go through the licence agreement and type y and enter to continue. You will then find a folder named something like jdk1.6.0_17, the current directory isn't the ideal place to keep this so use the command $ sudo mv jdk1.6.0_17 /usr/ to move it to the usr directory. You can double check that it is in the correct place by typing $ ls /usr
You can choose to move the JDK folder to any location you deem appropriate but remember the location of it as you'll need it to finalise the installation in this next step. For Tomcat to use the JDK JAVA_HOME and PATH variables need to be set, this can be done with the following comands,

$ JAVA_HOME=/usr/jdk1.6.0_ 18 (the full path to the JDK directory)
$ export JAVA_HOME
$ PATH=$JAVA_HOME/bin:$PATH
$ export PATH

Now you should be all set to install and start running Tomcat.

Installing Tomcat

Before beginning with the installation it's a good idea as a security precaution to create a tomcat user with low privileges and a strong password that can't be guessed. This is so that

$ sudo useradd -g 46 -s /sbin/nologin -d /opt/tomcat/temp tomcat

Now to download the binary, this can be found at http://tomcat.apache.org/download-60.cgi . Download the tar.gz file, also grab the MD5 checksum and save it as a text file then check the download with the following command.

$ Md5sum -c apache-tomcat-6.0.24.tar.gz.md5
apache-tomcat-6.0.24.tar.gz: OK

As long as the second line comes up with OK then the downloaded file came down in tacked and hasn't been tampered with. Now move the file to the location you wish the files to be kept and uncompress it. I have chosen to create a new directory called WebServer and moved the file to there.
$ mkdir WebServer
$ mv ~/Downloads/apache-tomcat-6.0.24.tar.gz ~/WebServer
$ cd ~/WebServer
$ tar -xvf apache-tomcat-6.0.24.tar.gz

Now as we created a user called tomcat we have to set the file permissions so that the tomcat user has read/write permissions on it.

$ sudo chown -R tomcat\: apache-tomcat-6.0.24

Tomcat is ready to run. At this point Tomcat won't restart on reboots, but this will be covered later in the performance configuration under Timeouts and connections. To start Tomcat cd into the Tomcat directory and into the bin directory within there.

$ cd ~/apache-tomcat-6.0.20/bin
$ ./startup.sh
Using CATALINA_BASE: /home/stephen/apache-tomcat-6.0.20
Using CATALINA_HOME: /home/stephen/apache-tomcat-6.0.20
Using CATALINA_TMPDIR: /home/stephen/apache-tomcat-6.0.20/temp
Using JRE_HOME: /usr/jdk1.6.0_18/

You should see output similar to that above and you are now running Tomcat. To test that it's working correctly open up any web-browser and type in the URL http://lochalhost:8080 and you should see the following screen.
Now that we have Tomcat installed and ready to go we'll next look at configuration for performance and security.

Saturday 9 January 2010

Moblin on the EeePC 901

After reading about the development of Moblin and owning an Intel Atom device myself I decided to give it a test run to see what it was all about. I downloaded both the 2.0 and 2.1 versions from here Moblin Releases. I also heard about the Ubuntu Moblin Remix being developed and downloaded a copy of that from here Dell Community. I tried all three of these with varying degrees of success.

All three (Moblin 2.0/2.1 and Ubuntu Moblin Remix) come as an img which can be used on a USB stick or SD card (instructions on this found at Moblin.org). Once booted from the storage media Moblin can be tried through the live img or installed, I decided to install to get the full experience. In all versions the install took roughly 3 minutes.

First off I tried Moblin 2.0 and the boot up and over all speed of the Distro was lightning quick. It took about five seconds for it to boot and there was no delay in navigating the system. The interface takes a little getting use to but once you learn where everything is and how it works it all becomes very easy and intuitive. Once you get to the UI you are greeted with "My Zone". Here you have three columns, one column with calendar and to do list, one with recently/most used apps and visited web pages and one column with twitter/last fm feeds and instant messaging.


The navigation bar hides at the top and has icons for different tasks, this bar can be accessed by either putting the curser at the top of the screen or by pressing the super key. (The super key on most PCs would be the one with a Windows icon on it, in the case of the EeePC it's the one with the image of a house). This Navigation bar when triggered by either method drops down to give you access to the icons.


The icons in the Navigation bar From left to right My zone, Status, People, Internet, Media, Clip Board, Applications and Zones. There are also icons for Bluetooth (version 2.1 only) Battery state, Volume and network.

Here's a breakdown of what they are:
My Zone : As described above
Status : Allows you to post twitter feeds and change your status on instant messaging accounts


People : Allows you to search for people and details within your IM accounts
Internet : opens Moblin's integrated Web Browser which fills the whole screen. This opens up showing the most/recently viewed web pages and an address bar.


Media : allows you to view pictures, play video and music
Clip Board : holds anything you've copied via Ctrl+C etc.
Applications : here you have different categories such as Accessories, Games, Office, Internet and Settings. Under each category as you would expect you'll find icons that link to different apps and there are a good range installed by default.


Zones : This is an interesting take on window management. Each window you open takes up most if not all of the screen and even though you can move and resize the windows you can't minimise them. With zones you can keep track of open windows and each window is held in a dfferent work space (simular to the virtual desktop idea). You can access these windows by clicking this icon and selecting the window/work space you want or by Alt+TAB or Ctrl+Alt+Arrow keys (this last keyboard short cut doesn't work in version 2.1 which is a shame as it gives a nice graphical switching effect when used).


There are very little differences between 2.0 and 2.1. The boot up time is the same, 2.1 brings with it Bluetooth and 3G support. On the EeePC 901 in version 2.0 the wireless works fine but could not connect to a network where the SSID was hidden, only when the Network name was being broadcast would it connect despite the fact that it lets you type in Network details manually. Strangely the Wi-Fi wouldn't connect at all in version 2.1 even though it could detect the presence of the network.


Even though the 2.1 version boasts 3G support I was unable to get connected through a mobile phone. The battery indicator is different between the two versions as in 2.0 you have the battery status and brightness control together but in 2.1 the brightness control has been removed.


When booting from the Ubuntu Moblin Remix img you don't have the option of running a live session only to install. When you select to install the whole process is automated and you have no option to edit partitions etc like you do with the Moblin images. UMR is pretty much the same as Moblin 2.0 but with more applications installed and includes what looks like Open Office. Although Moblin doesn't have Open Office installed or available there was a comment on Moblin.org from a user claiming that using a Fedora RPM to install OOo worked very well and even made icons available in the correct place. The real down side that I found from UMR was the fact that it took longer to boot. When you boot into UMR you are greeted with the same progress bar found in Jaunty then taken to the same interface as above.


Moblin 2.1 unlike 2.0 has an app store where you can install extra applications. With Canonical developing their version this OS could shape up to be pretty good with an extensive list of available apps. Moblin is still a bit unstable, there were a few times when it froze on me or things didn't work as it should but then the default Xandros install that came with my netbook wasn't any better and sometimes suffered the same faults. I'm going to keep this as a dual boot with Ubuntu Karmic if just for the sheer speed to get on to the internet. I can't wait to see future releases of this and watch it mature. When it becomes more stable and is used more on netbooks this Distro is not only good for Linux fans and hobbyist but also a great netbook UI for end users with little computer experience.