I've been using Apache Tomcat for some time now and it has done me well. I work for a small company that develop and deploy Java Web Applications and I was tasked with finding and deploying an enterprise grade server for our applications and so I've gone with Oracles GlassFish sever.
Tomcat is a Servlet/JSP container that you can configure and do allot with but GlassFish does so much more out of the box. GlassFish has allot more Administration tools and is supported by Oracle, it also has it's own HTTP front end called Grizzly.
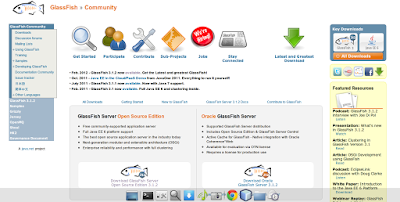
To get Started download the latest version of GlassFish from here. You have the option of the Open Source edition or the Oracle server. For this purpose we are using the Open Source Edition.

Once Downloaded you should have a glassfish-.zip file. Extract this anywhere on your system that you like (/opt/glassfish is a sugestion) and open up a terminal and cd to that directory. In this expanded Directory you will see the following
- Bin - binary files including asadmin
- glassfish - includes further directories for the container(s)
- javadb - Java Database (optional use not discussed here)u
- mq - Message Queue (not discussed here)
- pkg - package directory used for updating and extending GlassFish

Before we start make sure you have a JRE or JDK installed on your system. You can download the latest version from Oracle http://www.oracle.com/technetwork/java/javase/downloads/index.html
If like me you have multiple java versions on your system such as Oracle's JDK and OpenJDK you might want to specify exactly what one you want GlassFish to use. You can do this by adding this line to the file
AS_JAVA="/usr/PATH TO your JDK or JRE"You can use any text editor to do this such as vi.
In the bin directory you will find asadmin, you use this to administrate GlassFish via the command line. Add asadmin to your path or cd to the bin directory and type ./asadmin help for more information on what you can do.
By default GlassFish comes with a domain already set up (domain1), you can see this in/glassfish/domains , you can also view domains by entering asadmin list-domians.
By default GlassFish comes with a domain already set up (domain1), you can see this in
Lets remove this default domain and create a new one............
As you will see GlassFish goes ahead and uses some default port numbers. Default port numbers are....
4848 Admin port
8080 HTTP Instance port
7676 JMS port
3700 IIOP port
8181 HTTP_SSL port
3820 IIOP_SSL port
3920 IIOP_MUTUALAUTH port
8686 JMX_ADMIN port
You can change these in the Admin Console (Will be covered later) or by editing the file/glassfish/domains//config/domain.xml , this file is the equivilant to Tomcats server.xml file. You can also change ports by issuing commands like so........
Lets say you have decided on a portbase of 2000 you would type......
Now that you have done all the set up it's time to run it up and try it out. You can monitor the log as you start it up by tailing the/glassfish/domain//logs/server.log file. Issue the command asadmin start-domain so in this case asadmin start-domain example.
# asadmin delete-domain domain1
# asadmin create-domain exampleYou will then be asked to give an administrator name and password or you can press enter to accept default user admin with no password (for obvious reasons doing this will leave your GlassFish insucure).
As you will see GlassFish goes ahead and uses some default port numbers. Default port numbers are....
4848 Admin port
8080 HTTP Instance port
7676 JMS port
3700 IIOP port
8181 HTTP_SSL port
3820 IIOP_SSL port
3920 IIOP_MUTUALAUTH port
8686 JMX_ADMIN port
You can change these in the Admin Console (Will be covered later) or by editing the file
- To change the HTTP port to 10080:
asadmin set server.http-service.http-listener.http-listener-1.port=10080 - To change the HTTPS port to 10443:
asadmin set server.http-service.http-listener.http-listener-2.port=10443 - To change the administration server port to 14848:
asadmin set server.http-service.http-listener.admin-listener.port=14848
If you have a port range in mind you can change the port numbers on creating a new domain. This is also very handy if you are creating multiple domains. When creating a new domain you can pass the argument portbase with the portbase number of your choice and it will increment the portnumbers to that number like so.......
Admin port: portbase + 48
HTTP listener port: portbase + 80
IIOP listener port: portbase + 37
JMX port: portbase + 86
HTTP listener port: portbase + 80
IIOP listener port: portbase + 37
JMX port: portbase + 86
Lets say you have decided on a portbase of 2000 you would type......
# asadmin create-domain mydomain --portbase 2000and GlassFish will give you a new domain "mydomian" with HTTP port 2048, SSL port of 2081 etc. this can save you time and instantly resolves port conflicts if you are creating multiple domains.
Now that you have done all the set up it's time to run it up and try it out. You can monitor the log as you start it up by tailing the
Now you can open up your web browser and enter localhost:8080 you should be presented with the following page.
Congratulations you have successfully set up your GlassFish server. Next time we'll look at further configurations, using the admin console, security and web applications. Stay Tuned.


No comments:
Post a Comment